Saturday, October 4, 2014

Persimmon "Fudge"

For the next few weeks, I'm a country mouse before I move to NJ with my new husband. This land, where I grew up, is covered in wild persimmon trees, so I decided to try my hand at baking with them. Word to the wise: maybe don't use wild persimmons if you want to take this on. They're about the size of golfballs, and probably 90% of their volume is comprised of seeds. Don't say I didn't warn you...


The horses "helped" by trying to eat the bag. 

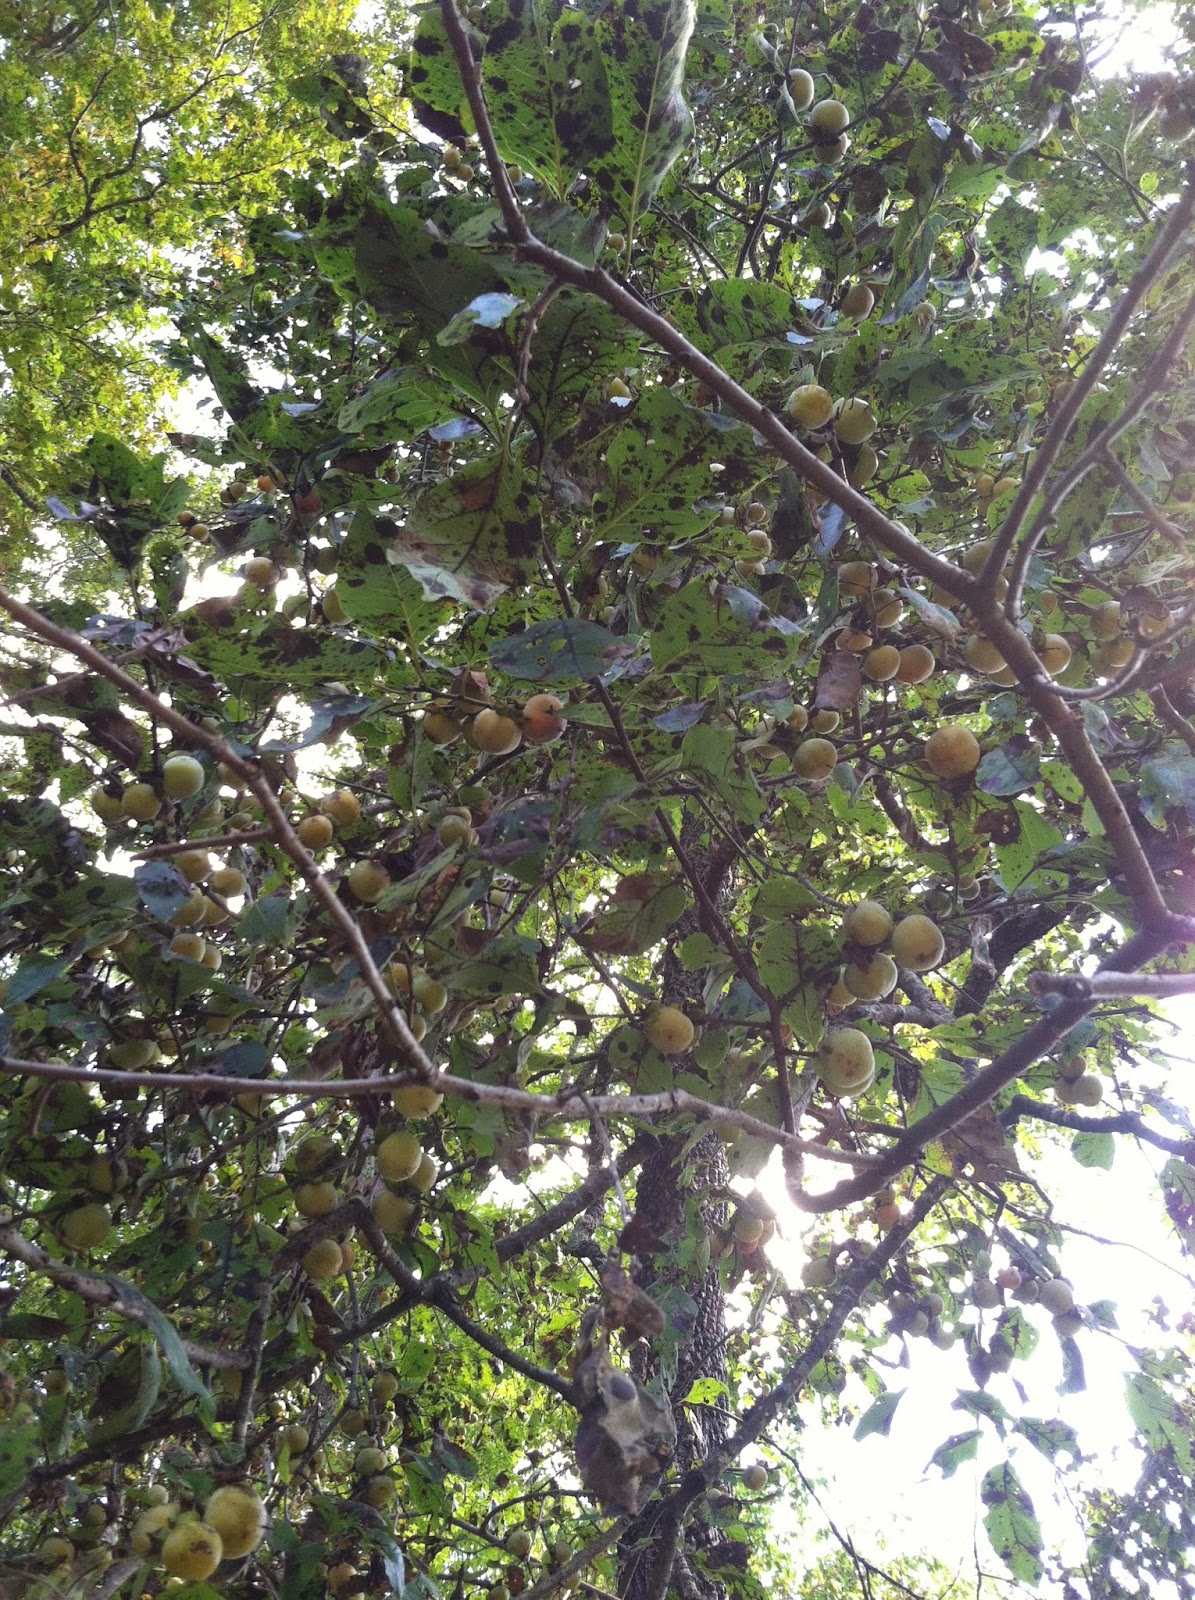
Pippin--my intrepid pathfinder--and I traipsed all over the 60 acres and found 3 good-sized persimmon trees. Of course, this means that the fruit is all a minimum of 25 feet off the ground. Let me remind you that I'm 4'11". 


The fruit is up so high, in fact, that when it falls off the branch, it hits the ground like a minor explosive device. I thought I'd forage off the "ground-fruit" since I couldn't reach the branches, but most had either exploded or were well along the rotting trajectory. So I ventured onward.

Pippin, the Intrepid Pathfinder

Just as I was questioning the feasibility of this baking excursion, I saw it: a persimmon tree. With branches way, way up....and one that had fallen down onto a smaller tree! I wrestled with the limb until I was able to get it on the ground and harvest as much fruit as I could. 


JACKPOT!! 

Then I walked through the woods, looking like a dingbat carrying my oversized plastic Belk bag, weighed down with persimmons. To make matters worse, I started thinking about how beautiful it is out there; since I'm moving to NJ in a few weeks, and my parents' house is on the market, I have no idea when I'll get to see this land and this view again, if ever, so I just stood there and cried. Then we saw 2 deer and a very cool spider. The deer and the spider saw a red-eyed, puffy-faced, sniffling girl who was talking to herself, so they're probably writing in their blogs about me right now. 


Why, yes, we've been walking in the woods and meadows. How could you tell?


Once we got back to the house, I soaked the persimmons to get the bugs off, etc. The more rotten ones I had picked first were on the bottom of my bag, so they had gotten smashed by the weight of the others. Thank goodness it was plastic, not canvas. While the persimmons soaked, I tried to get some of the stick-tights off my pants and shoes, and Pippin's face. I bet you wish you were there, because you've probably heard tales about how well-behaved Pip is when it comes to being groomed-- ha!

After about an hour of soaking, I drained and dried the fruit on paper towels. Because I had forgotten that I'd need eggs for my recipe and had only hours before hard-boiled every egg in the house, I had to wait to bake until I could refill my supply. These are the moments a girl wishes for chickens...

Once I got the eggs, I got started. I adapted a recipe from a southern Appalachian cookbook of my grandmother's, called Smokehouse Ham, Spoon Bread and Scuppernong Wine, by Joseph Dabney. By "adapted", I mean "followed loosely, but would have had better results if I followed more closely."

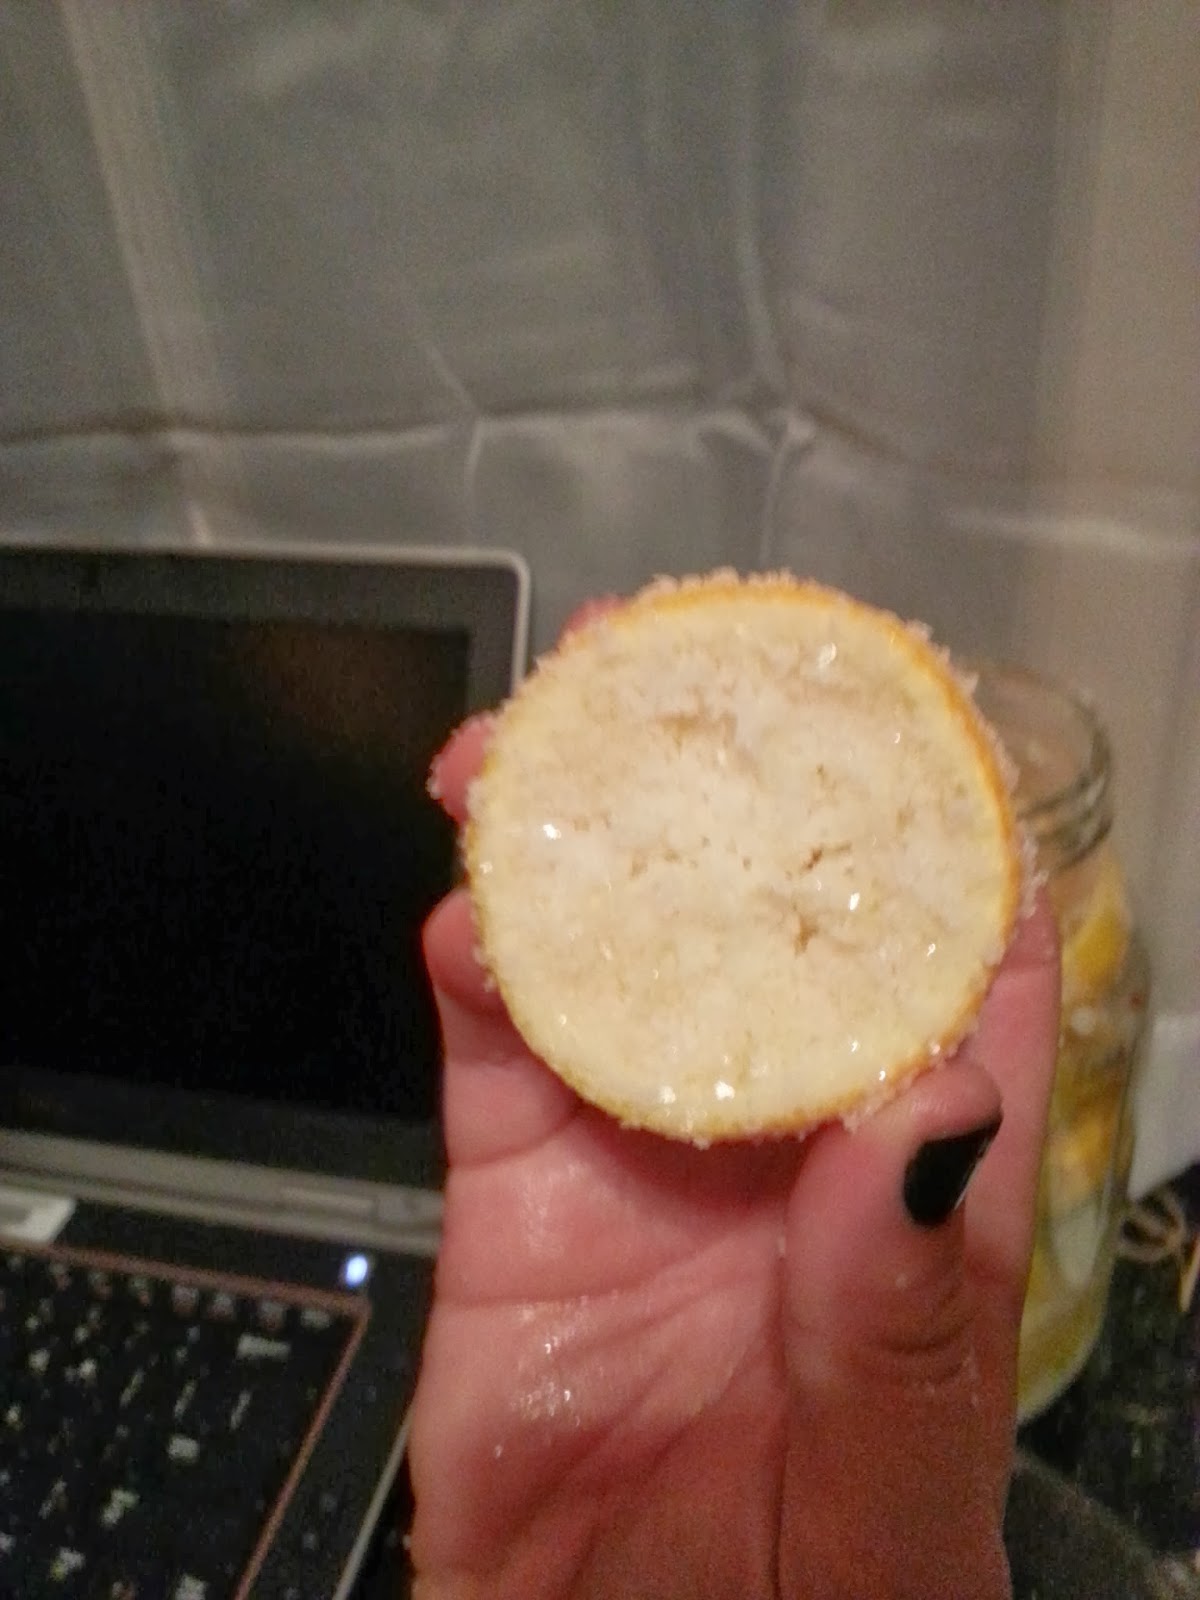
Step 1: Figure out what to do with the persimmons. This is where using the non-wild variety would come in handy, because they're HUGE in comparison. I used a paring knife to peel them, cut them in half, and pull the flesh from the seeds. The seeds are also inside a little membrane, so I pulled those off just to get more "meat."

A 1-cup measure, shown with the amount of meat from one persimmon. Seriously, they're 90% seed. It took about 30 persimmons to make the (barely) heaping cup needed for the recipe, and a solid 2 hours.  


Step 2: Follow instructions Do your own thing. I "adapted" the recipe, particularly the sugar content. This is for two reasons: 1) we don't like things super sweet, and 2) my parents currently have a "use it up" policy with these sugar packets, and I just wasn't up to opening another 16 of them. At your next cocktail party, you can impress everyone with your knowledge of how many sugar packets go into 1 cup. Hint, it's 64.


 The recipe was for "Rabun County Persimmon Loaf", but my dad and I joked that it turned out with a consistency more like fudge, although it tasted pretty good. Very chewy and dense, but I am pretty famous in my family for making doorstops any time I try to make bread. It's a fun family joke that I can never rise above [haha, RISE-- bread pun!]...[sigh]. I also added spices, 1/2 tsp each of nutmeg and allspice in addition to the cinnamon it called for. I added a splash more milk, since the 1/2 cup didn't quite get all the dry ingredients wet enough to form a dough. Any of these changes could have made it doorstoppy I s'pose.

The consistency issue could stem from the fact that when the recipe said "flour", I grabbed the only kind of flour we had, All-Purpose. The recipe didn't call for soda or yeast, so it probably meant Self-Rising flour. I guess everyone in Rabun County knows that and I'm just a ditzy city mouse.

Upon completing this self-assigned persimmon task, I was informed that there are 3 healthy, fruitful (literally) persimmon trees within 30 yards of the house. But Pippin and I enjoyed our excursion, stick-tights and all!


Thursday, December 26, 2013

Lemons for Days

It's winter in New Orleans, y'all, and that means citrus for dayyysssssss!

Lemons, limes, satsumas--oh my! 
Hollygrove Market and Farm and various backyard grower friends have bestowed upon me such a bounty of citrus that I decided to preserve it.....by making preserved lemons!  A staple in Middle Eastern dishes, preserved lemons add a mellow, salty-citrusy brightness to literally any dish.  The recipe is super simple: you need lemons, coarse kosher salt, additional spices, and a mason jar.  I used a variety of lemons; my current favorite is the Meyer lemon, which is sweeter than a regular lemon since they are believed to be half lemon, half mandarin orange.  

Since these lemons are being preserved whole, using organic lemons is best--that way you know that the peel isn't harboring any harmful chemicals.  Either way, be sure to scrub the lemons thoroughly before following through with this recipe.  
Score the lemons lengthwise, leaving the very bottom of the lemon connected.
Loosen the score a bit with your fingers so you can pour salt all up in there.    
The more salt; the more, the better.  Pack it in there real good!  
Pour about a half inch of salt on the bottom of the mason jar, then pack the lemons in.
I used a HUGE jar, because I had so many lemons, but any size jar will do.  
Squish the lemons into the jar as you pack them, and fill to within an inch of the rim with extra lemon juice.  I ran out of lemon juice and instead juiced a satsuma and a grapefruit; as long as the juice is acidic, I don't think it matters much in a pinch.  You can also throw some additional spices in there to brew--common additions are bay leaves, whole black peppercorns, and a cinnamon stick.  

Once the lemons are packed in the jar, let them sit for a while in a cool, dark place.  Mine sat for 14 days, but the longer they sit, the softer the peel becomes and the mellower the flavor.  I turned mine upside down once a day to be sure the brine was evenly incorporated.  

When your lemons are ready, pull one out and slice it as thinly as possible.  A lot of people scoop out the pulp, but I like to add it to my dish, especially if I'm mixing instead of sprinkling and the saltiness can be evenly distributed.  A lot of people also rinse the salt off the peel before slicing, but I would rather use that citrusy salt and just leave out any additional salt my dish requires.  You can add your preserved lemons to risotto, potato salad, sauteed greens, roasted potatoes....they literally brighten the flavor of any dish.  Bon appetit!  

Sunday, September 29, 2013

Cuban Pork STRAIGHT FROM HEAVEN

Two bits of back story to make this latin gem complete:

1. I have a group of friends who get together on a regular basis for a potluck dinner in the theme of whatever country the host/hostess chooses.  We've done Granada, Spain, even Afghanistan...and last night was Cuba.  No one brought cigars.  Cue disappointment. 

2. Not too long ago, I was sucked in by Albertson's grocery store's buy-1-get-2-free (yes, you read that right) meat special; I ended up with more meat than I knew what to do with....so last night, I cooked it. I cooked it real good. 

The recipe involved a slow cooker, so automatically, I was all in from the get-go.  

Y'all know I love a good slow cooker recipe
I substituted 7 rib chops for the one bone-in shoulder the original recipe used, which allowed me to cut the cook time almost in half.  I drizzled grapeseed oil in the crock pot, tossed the pork in it, then added 10 whole cloves of peeled garlic (yummm), cumin, kosher salt, fresh ground pepper, crushed red pepper flakes, and some cinnamon.  I squeezed 4 fresh limes into the pot and topped the mixture with about 1/2 a can of frozen orange juice concentrate.

Those weird orange turdlets are the OJ concentrate.  I swear.  
I turned the crock pot on high and let it cook for an hour, then switched it to low and cooked until the meat fell off the bone; about 6 hours.  In the meantime, I painted my house.  

You know, the usual mid-cooking rampage activity.  No big deal.  Whatevs.  
Once the pork was tender, I stuck the whole crock pot in the fridge to cool.  Of course, this felt like it took forever.  
Yea lord, give unto me the strength to NOT EAT ALL OF THIS RIGHT NOW. 
Once cool, I shredded the meat with two forks while I made a reduction of the pork juices: I strained out all the solids: 
Yes, that's ALL garlic.
and simmered the pork juice, 2T apple cider vinegar, more garlic (I chopped all those cloves I roasted with the pork in the crock pot), more crushed red pepper, more lime juice, and salt and pepper.  I whisked it occasionally over medium-high heat until it reduced to about 1/4 its original volume.  

I poured the sauce over the shredded pork in a casserole pan and tossed the two together.  

¡y....voila!  
It seemed wayyyyy too simple to be this delicious; but no, it is NOT too good to be true!  It even got a shoutout from the Cuban host himself.  Then momma went and had way too many mojitos and that's where the story ends.  Y'all enjoy.  

Monday, September 16, 2013

So-Good-Yet-So-So-Bad Chocolate-Merlot Torte

The BrewMeister and I recently went hiking at The Narrows of the Harpeth (if you live in Nashville and like hiking/ kayaking, I recommend this place!) We were famished afterwards, so we trekked to The Cottage Cafe in Bellevue, a tiny cafe/bakery nestled between an antique store and a home furnishings consignment shop. I was initially drawn to this place because of its sense of humor: anyone who knows me will know that I appreciate insanely corny puns and clever witticisms over all else. This place's bakery was called "Crumb de la Crumb," so I had to try it.

This is where Fate comes in.

On the day we visited (which was my 2nd time that week, but I digress), we wanted to try a certain type of cake. We ordered, then were devastated when they were out of that flavor. Did we want to try another one? "We have a delightful Chocolate-Bailey's cake and--this isn't on the menu yet--we have a fresh Chocolate Merlot cake, too."

Chocolate and merlot? Chocolate and merlot! Two of my favorite things!

It was heavenly. So I decided to make one. I found this recipe and intended to follow it word-for-word, but that is not what happens when I decide to bake.

You will need:
Electric or hand mixer
Sieve or flour sifter
9" Springform pan
Rectangular pie pan or larger circular pan that your springform pan can fit INTO while baking

9.7 oz bittersweet chocolate
1/2 c sugar
8 Tbsp merlot (remember to save some for the cook!)
8 oz (1 stick) butter, melted and cooled
5 large eggs
1 Tbsp AP flour


For the chocolate, I used a mixture of 70%, 85% and 90% cocoa. 

These brands were purchased from Wal-Mart (Lindt) and Aldi (Moser Roth). No need to go all boutique-expensive for this recipe. The Aldi chocolate was so yummy by itself, I highly recommend it for snacking at $1.99 for 4 oz. Cha-ching.

The first step I took was to melt and cool my butter, since that would take a bit of time. While the butter cooled, I chopped the chocolate. Keep in mind, the smaller pieces you have, the less time it will take to melt and the sooner it will become smooth. I usually like to keep my nibbling chocolate in the freezer, but for easy chopping you'll want it at room temp. Put the chopped chocolate into a bowl.

Then butter the spring form pan, pre-heat the oven to 350* and measure out your merlot:


This part was strange for me: measuring wine in tablespoons? Usually I measure wine in what I like to call "serving sizes" of "glasses" or "bottles."

For the merlot, I used a hoity-toity bottle, purchased at my local wino-ry for 3/$10. As you can see in the photo, this wine has been previously opened. Again and again.

*A note on the wine you choose: don't just buy a wine because it's cheap. Buy a wine that you know you like (you're only using 8 Tbsp, after all, so you'll have plenty left over). When you cook or bake with wine you should ALWAYS use something that you would actually drink. Be sure to do some quality control sipping of your wine while you bake.*

Combine the merlot and sugar in a saucepan over high heat, stir constantly until it boils, then pour the heated mixture over your chopped chocolate and stir until it's smooth and scrumptious. Add 1/2 the melted butter, stir, then the other 1/2.


Sneak a sample here, before you add the raw eggs! 

 The 5 eggs go in another bowl and get beaten/ whipped for 7-8 minutes until they've tripled in volume. Make sure you do this for the full amount of time, so your eggs will be stiff and the torte will be fluffy and splendid.


Add 1/2 the eggs to the chocolate, fold in, then add the other 1/2. Make sure not to over-stir because you want the eggs to retain their fluffiness. 

Sift or sieve the flour into the mixture, fold in, then pour into your prepared pan.


You are well on your way to savoring heaven on earth!!

Your springform pan will go into a water bath, so find a baking dish or casserole dish that is large enough to hold your springform pan and fill the bottom dish halfway with hot water. The purpose of a water bath is to make sure that the whole cake cooks through evenly, instead of the sides and bottom (that are in contact with the hot sides and bottom of the pan) overcooking while the center is undercooked. 

*If you realize at this point in the recipe that you don't have a pan this big because the springform is bigger than you thought it would be, DON'T PANIC-- your dessert will still be delicious. I know, because this is what I accidentally did. I just filled the casserole dish with water and put it in the oven with the torte, which is not the same thing, but that's why your stab at this recipe will hands-down be better than mine. Let me know when you make it, I'll head over.* 

Bake for 30-35 minutes. Your kitchen will smell DELICIOUS, even if your dog has gas. The torte nicely masks ugly smells. 


Once a toothpick inserted in the center comes out un-chocolatey, the torte is done. Let it cool to room temperature IN the water bath, then transfer upside onto a plate and transfer again upright to a flat plate or cake stand. 

Don't be afraid to try this one! Chocolate can be intimidating, but don't let that scare you. This recipe is very easy and oh-so-rewarding. Bake it for a party or don't tell anyone you made it and eat the whole thing while you Netflix 30 Rock. 

Cheers! 


Saturday, September 14, 2013

Okra okra okra okra rockin' everywhurrr

As many of you know, I volunteer at Hollygrove Market and Farm every Sunday afternoon.  In exchange for my 4-hour volunteer shift (that I've been doing weekly for 9 months now, wowza!), they reward me with a box chock full o' fresh, local, often organic, seasonal fruits and veggies.  Recently, the box has been overflowing with delightfully crunchy okra!  Mah fehvorite! (<--said in the Irish hen's voice from Chicken Run, obviously)

Tis the season...
I wanted something different from the tried-and-true fried okra, so I tried a recipe that HMF included in their weekly newsletter--a recipe for African-style okra and tomatoes.  The prep was pretty quick and the cooking was slow, so I didn't take many pictures of the process....I know, I know, I'm the worst.  

I started by trimming the ends of the okra and steeping them in white wine vinegar, stirring frequently, for about 20 minutes while I prepped everything else.  Apparently, cooks in the South swear that soaking okra in vinegar "lowers okra's slime quotient," but I can't say I noticed any less slime in this recipe.  

While de-sliming the okra, I sautéed onions in grapeseed oil, then added shiitake mushrooms (even though the recipe called for button mushrooms, I got shiitakes in the Box!).  After a few minutes, I added diced tomatoes, garlic powder, black pepper, turmeric, cinnamon, nutmeg, and allspice, approximately a dash of each, and a handful of potatoes cut into large bite-size pieces.  I stirred well and then simmered uncovered for about 15 minutes.  

I added okra and some extra water last, then simmered covered for 45 minutes.  Since I have zero sense of forethought and chose my skillet before realizing I don't have a lid that fits it, I just used a cookie sheet and Rosie the Riveter-ed the shit outta this thing.  

Gorgeous pot o' color! So healthytimes yes!
Caution: while simmering, your entire house will begin to smell like the most delicious Afro-Carribean spice rack ever.  Embrace it.  Also embrace the fact that the turmeric in this recipe will temporarily stain any light colored surface it comes in contact with, including countertops, cutting boards, Tupperware, and these white-girl fingertips.  

After 45 minutes, I removed the okra, cut them into chunks, then added them back in and stirred and DEVOURED.  I enjoyed this recipe all week long for lunch and dinner, over rice and by itself, and the spices just got more aromatic as the week went on.  This makes a great, hearty stew for summertime, without being so heavy that you just want to lay down and die.  So go getchu some! 

Monday, September 2, 2013

"I just made the most delightful batch of gray cupcakes!"

Alternate title: 
"Brain food-- gray matter"

It was after dinner. I knew I wanted to bake something sweet and I knew there was no chocolate in the house, so I opted for a vanilla cupcake recipe, which is not my usual go-to. If you ever want to bake me anything, know that I respond quite well to chocolate. 

I started with this Martha Stewart recipe for vanilla cupcakes. Because our apartment has been infested by mold/mildew and I found today that many of my cupcake tins were mildewed, I quartered this recipe so I could use the 1 pan that wasn't ruined, which happened to be a 6-cupcake pan. Also, if there were 24 cupcakes in the house, I'd eat them all due to despair and frustration from the aforementioned mildew problem. By this point I've only eaten 2 cupcakes, half a tub of hummus, and have only sat in front of the TV drooling for, like, 3 hours. So I'm ok.

But, I digress.

In addition to *approximately* quartering the recipe (which included some odd measurements, like 0.375 cups...) I substituted brown sugar for white (again, using what I had in the cabinet). There may be some conversion tables to do this correctly, but I just kept the amounts the same. That, in conjunction with what I did next, is probably what made them gray.

Next, I raided the fridge. The Brew Meister had made some peach jam little while back, so I polished that off into the batter. He also took a business trip to Boise last week and thoughtfully brought home a small jar of huckleberry jam for us, so a spoonful went into the batter, too. That's probably the color culprit. In the photos, the cupcakes don't appear very gray, but trust me: they are. In fact, if I didn't have a mouthful of sweet teeth and a sugar craving the size of Russia, I might not even eat them (Disclaimer: that's probably not true.)


Because I added extra wet ingredients (2 flavors of jam), and didn't amp up the dry ingredients in return, and because my measurements may have been slightly significantly off, the cupcakes were a little gummy. The Brew Meister suggested "icing" them with some more of the huckleberry jam, which was a great suggestion.


The whole process of deciding to make cupcakes, finding a recipe, gathering ingredients, doing my math, and making the actual batter seemed to be an out-of-body experience. Clearly, whatever part of my brain that responds to sugar was leading the way here. Since that was the case, I didn't remember to get pictures of the assembly process. So, I took a picture of my sink after the fact:


Here's a funny side effect of this blog: because I know that at least one person is reading this (thanks, Mom!) I also subconsciously act as if people are watching me in my kitchen, so I tend to clean up really well and really quickly. Trust me, (and ask the Brew Meister), this is not something I do after every meal.

Thanks for reading, and I hope your cupcakes turn out better! Maybe adding only 1 flavor of jam, or not any jam, but making a nice icing, or just not baking them and eating the batter straight out of the bowl will result in better eats. I will not say if there was any leftover batter that didn't make it into the cupcake pan with this batch (wink).

Wednesday, July 31, 2013

Asian Meat-wads!

I haven't blogged much lately, but I have been cooking-- for the past 2 weeks I've been volunteering at our local Whole Foods. It has a cooking school that offers cooking classes throughout the year, including weeklong kids camps during the summer. If you've got a kid age 7-15, I recommend this as a summer activity! Each day is a different global theme, so this year we had American, Indian, Italian, French and Latin American Day (drooooool). Anyway, all that to say, if I don't encounter another child with a knife for the next 12 months, I'll be happy. Just kidding, they're a joy. With knives. 

So, today's experiment was a mind-concoction, like so many of my dishes are. I decided to make some Asian meatballs, and I must say they turned out deliciously! I forgot to take pictures during the process, but here's the finished product: 


WARNING: as a mind-concoction, there are no actual measurements, so experimenter beware.
2 lb ground pork (next time I might substitute 1/2-1 lb of ground beef, just for a textural variety)
chopped leaves of 2 small bok choy (you can stir fry the stems later!)
1 very large clove garlic 
1/4 onion, diced
~1/2 tsp? fish sauce
~1 Tbsp? soy sauce (I used Worcestershire because it's all I had)
~1/4 tsp each of: allspice, turmeric, cinnamon, curry powder and cayenne

Mix all ingredients together in a large bowl, form into golf-ball sized wads, then dredge in bread crumbs so the outsides will become deliciously crispy. Then bake at 400* for 20 minutes, according to Alton Brown (as I was making these, a meatball episode of Good Eats just happened to come on. COINCIDENCE?!) He suggested cooking them in a mini-muffin tin so the juices can drain down, but I did it on a baking rack and lowered the temp to 325*. You can use a meat thermometer or just cut into a wad to see if it's done. I served them by themselves right into my mouth, but you could put them on top of rice noodles, as a side to stir fry, let 'em soak up some pho or curry broth. Almost anything can be done with the adaptable meatwad!